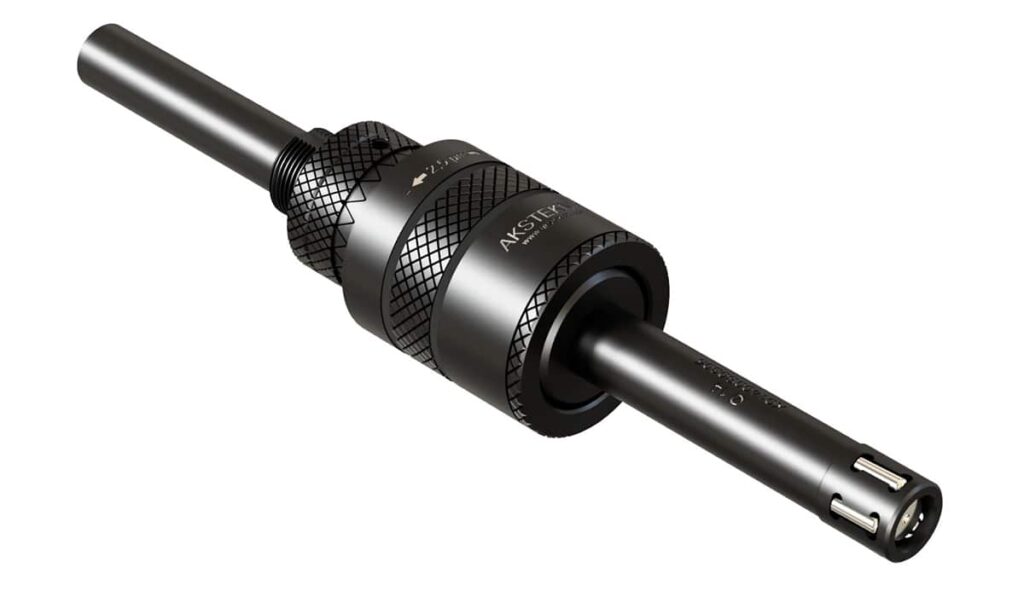
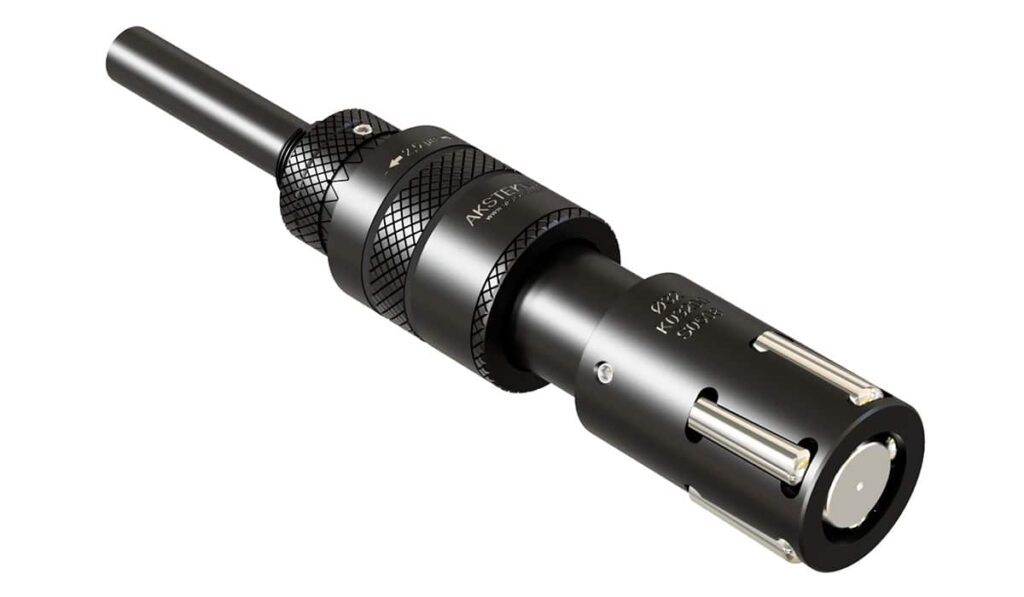
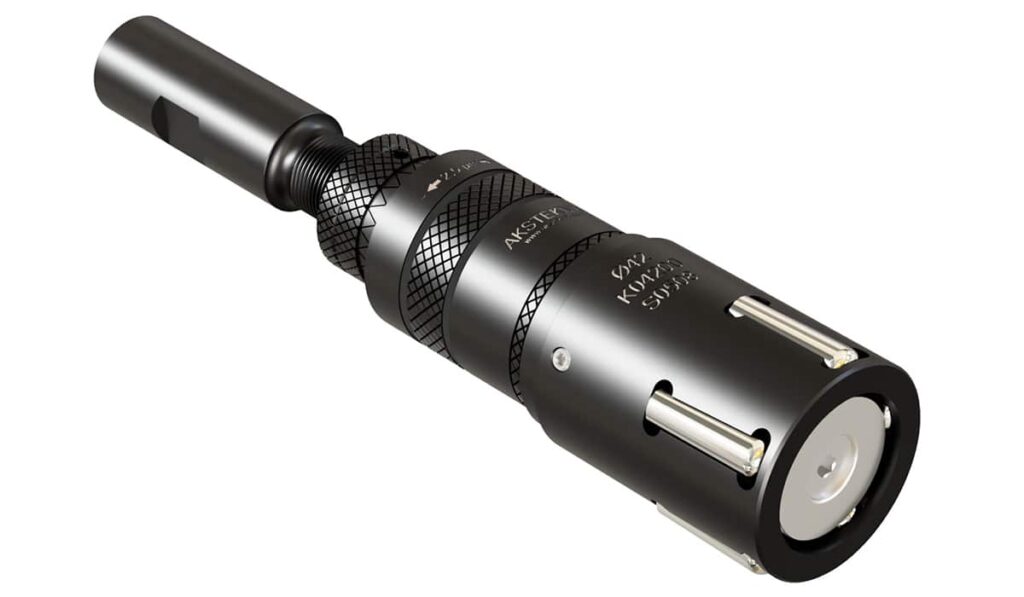
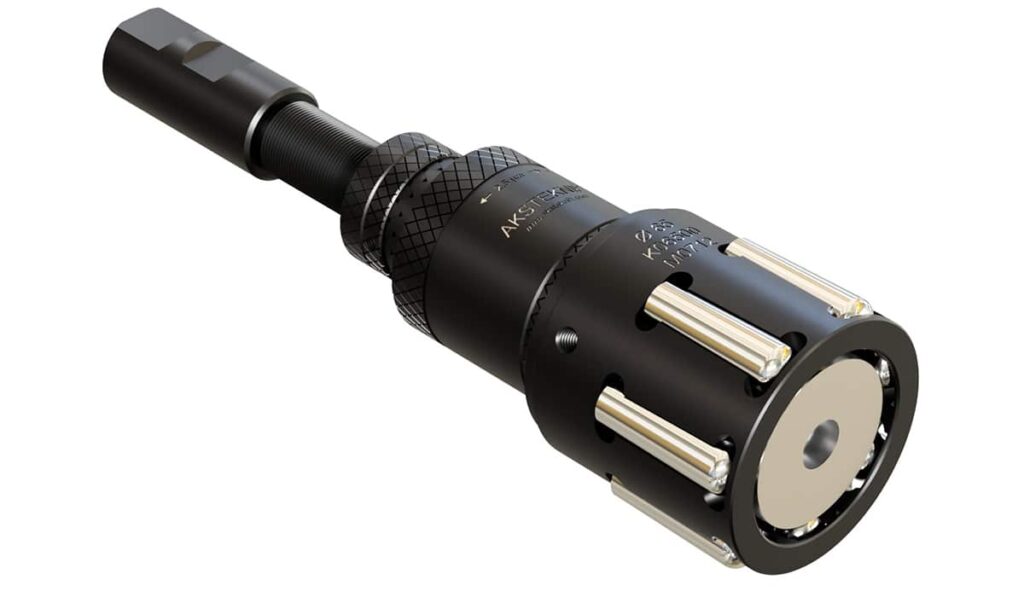
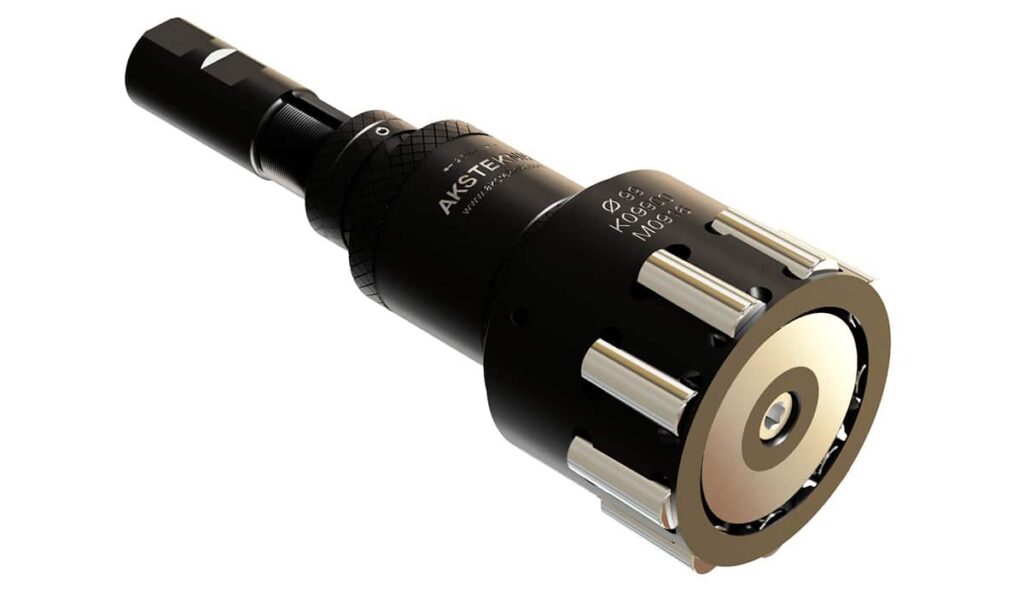
Internal Roller Burnishing Tools
- Home
- Roller Burnishing
- Internal Roller Burnishing Tools
OVERVIEW
Internal Roller Burnishing Tools
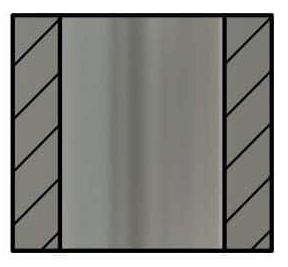
| FOR THROUGH HOLES | FOR BLIND HOLES | ||
|---|---|---|---|
 |
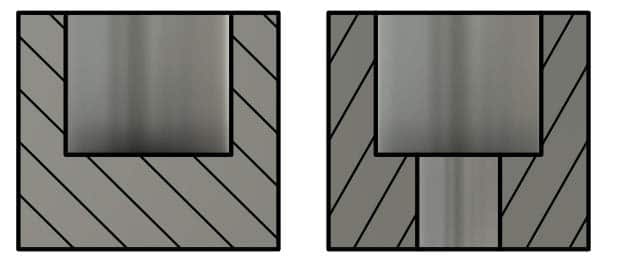 |
||
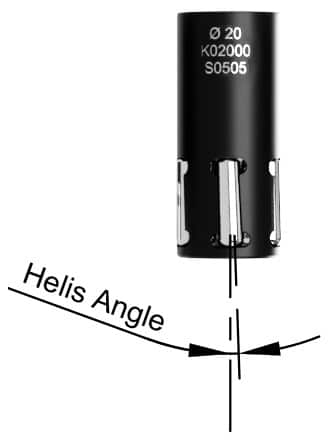
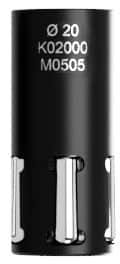
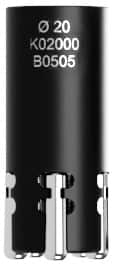
| SELF FEEDING (S) | MACHINE FEEDING (M) | MACHINE FEEDING (B) | |
 |
 |
 |
|
| EASY USE ON MANUAL MACHINES AND LATHES | BEST FOR CNC MACHINES | MACHINE FEEDING FOR ALL MACHINE TYPES | |
What is Burnishing?:
Internal Hole Burnishing Process
As the name suggests, burnishing is the process of compressing the surface roughness using rollers. This process results in mirror-like surfaces. Generally, it is applied to holes and shafts. When no heat treatment is applied, it produces excellent results on all types of metals (aluminum, cast iron, steel, stainless steel, bronze, etc.). It is performed after pre-processing operations such as turning and reaming. For cold-drawn or forged materials, chip removal is required before applying burnishing. This means that there must be surface roughness from the chip removal process for burnishing to take place. With internal hole tools, diameter adjustments can be made with a precision of 2.5 microns, or 0.0025 mm.
The most important aspect is that the process duration is very short, typically lasting only a few seconds.
Burnishing smooths the parts that have undergone pre-processing (turning, reaming, etc.), while simultaneously ensuring dimensional accuracy. For parts requiring precise surface finishes, burnishing offers an excellent alternative to honing, polishing, and grinding, providing a perfect surface in seconds.
Working Principle:
Internal Hole Burnishing Operation – Videsu
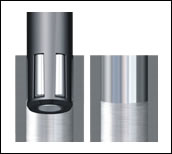
The principle of burnishing is that the roller, following a specific path, transfers the applied force to the metal surface. The figure shows the burnishing process. After the pre-processing (turning, reaming, etc.), the metal surface undergoes burnishing with the help of a precise mechanism, resulting in contact between the rollers and the surface.
Burnishing Process
Surface Roughness
When observing the micro surface profile of metals, peaks and valleys can be seen. During the burnishing process, force is applied to the peaks, causing the valleys to rise. The roller makes contact with the workpiece, and the metal’s yield point is surpassed, resulting in plastic deformation. In this region, the metal is compressed in fractions of a millimeter. After plastic deformation, the material elastically recovers to some extent. The roller then makes its final contact with the metal, ensuring the surface is smooth and shiny.
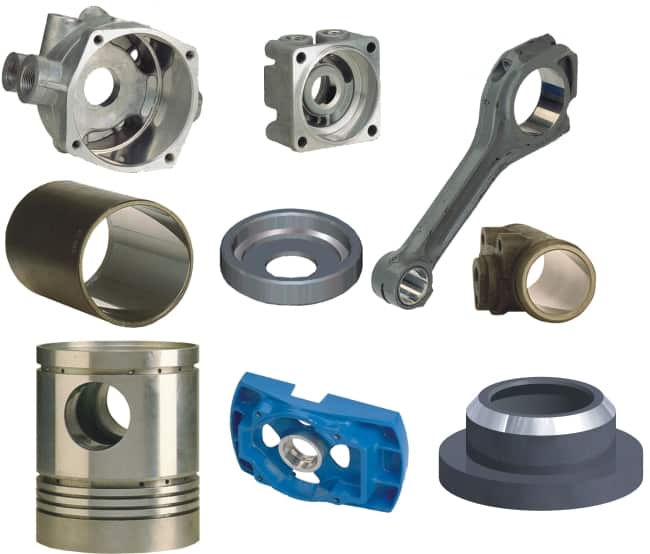
Application Examples:
Burnishing Process
Burnishing Application Example Images
Advantages of Burnishing Technology:
- Rz < 1µm and smooth surfaces can be achieved.
- Desired dimensions are easily and quickly obtained using this method.
- The process finishes in a single pass. The process duration is measured in seconds, compared to minutes with other methods.
- While burnishing polishes the surface, it also hardens it, making the treated surface more durable and shiny.
- No chips, chip dust, or residues are left behind, it generates no noise, and it is environmentally friendly.
• The tools can be connected to and used with all Universal and CNC machines.
- Tools are highly durable. They can be used for long periods without any dimensional changes due to wear.
- What materials can burnishing be applied to?
Burnishing can be applied to most metals, including steel, aluminum, copper, stainless steel, and titanium.
- How does burnishing affect surface hardness?
This process increases hardness by applying pressure to the surface. As a result, a more durable and aesthetically pleasing surface is obtained.
- How is the diameter adjustment of a burnishing tool made?
The diameter adjustment is made by turning the adjustment mechanism on the tool’s body step by step. Each line represents 2.5 microns, and a full turn corresponds to 0.05 mm. However, since part of the material being burnished elastically deforms, the actual adjustment becomes more precise.
- What is a stock allowance, and why is it important?
A stock allowance is the extra material thickness left on the surface. This stock allowance allows the surface to be burnished smooth. It varies depending on the size of the workpiece and the type of material.
- What problems can arise if the stock allowance is too high or too low?
Excessive stock allowance can lead to unnecessary energy consumption and surface defects such as fretting, bearing wear. Insufficient stock allowance can cause undulations on the surface.
- Why is pre-processing important in burnishing?
A suitable pre-processing step ensures a high-quality surface is obtained. Turning or reaming processes are ideal for preparing surfaces. The surface must have sufficient roughness to allow for effective burnishing.
- Does the stock allowance vary by material type?
Yes, hard materials like steel or stainless steel require less stock allowance. Softer metals may need more stock allowance. A starting stock allowance of 0.02-0.03 mm is generally ideal.
- Does the stock allowance vary by material diameter?
Yes, as the diameter increases, more stock allowance may be needed. Larger diameter parts require a higher stock allowance to achieve a smooth surface.
- What is the appropriate wall thickness for burnishing?
A wall thickness of at least 10% of the diameter is recommended. For example, a part with a 20 mm diameter should have a minimum wall thickness of 2 mm. Thin wall thicknesses increase the risk of deformation.
- What is the appropriate material hardness for burnishing?
Generally, it is recommended that the material hardness be below 40 HRC. Unhardened materials are usually more suitable for this process.
- Why do blind hole tools have limited diameter adjustments?
In burnishing tools, diameter adjustment is made by the forward and backward movement of the conical shaft. As the tool diameter increases, the risk of the conical shaft’s tip hitting the bottom of the hole increases. In stepped holes, the conical shaft may enter the step, allowing for more diameter adjustments in blind hole tools.
- What are self feeding tools, and where are they used?
The self feeding feature of the tool is achieved through the helix angle of the rollers. This feature allows for ease of use on manual machines. With a column drill or a universal lathe, it is enough to just provide rotation; the tool automatically moves inside the workpiece. It works similarly to a tapping operation.
- Can self feeding tools be used on CNC machines?
Yes, self feeding tools can also be used on CNC machines. For this, the feed rate of the machine must be higher than the pulling speed of the tool. If the feed rate is too low, the tool cannot achieve complete burnishing, but this will not damage the tool. The appropriate feed rate can be easily found with a few trials.
- Which parts of the burnishing tool wear out?
The most worn parts of burnishing tools are the rollers. Since the rollers are in constant contact with the surface, they wear out over time. Additionally, the conical shaft also wears out over time. However, since this process is not cutting, the lifespan of the tool is much longer compared to conventional cutting tools.
- Can the rollers be replaced one by one?
No, the rollers are replaced as a set. After several sets of rollers have been replaced, the conical shaft may need to be changed.
- How can I purchase burnishing tools?
You can contact us through our website for orders or more information.
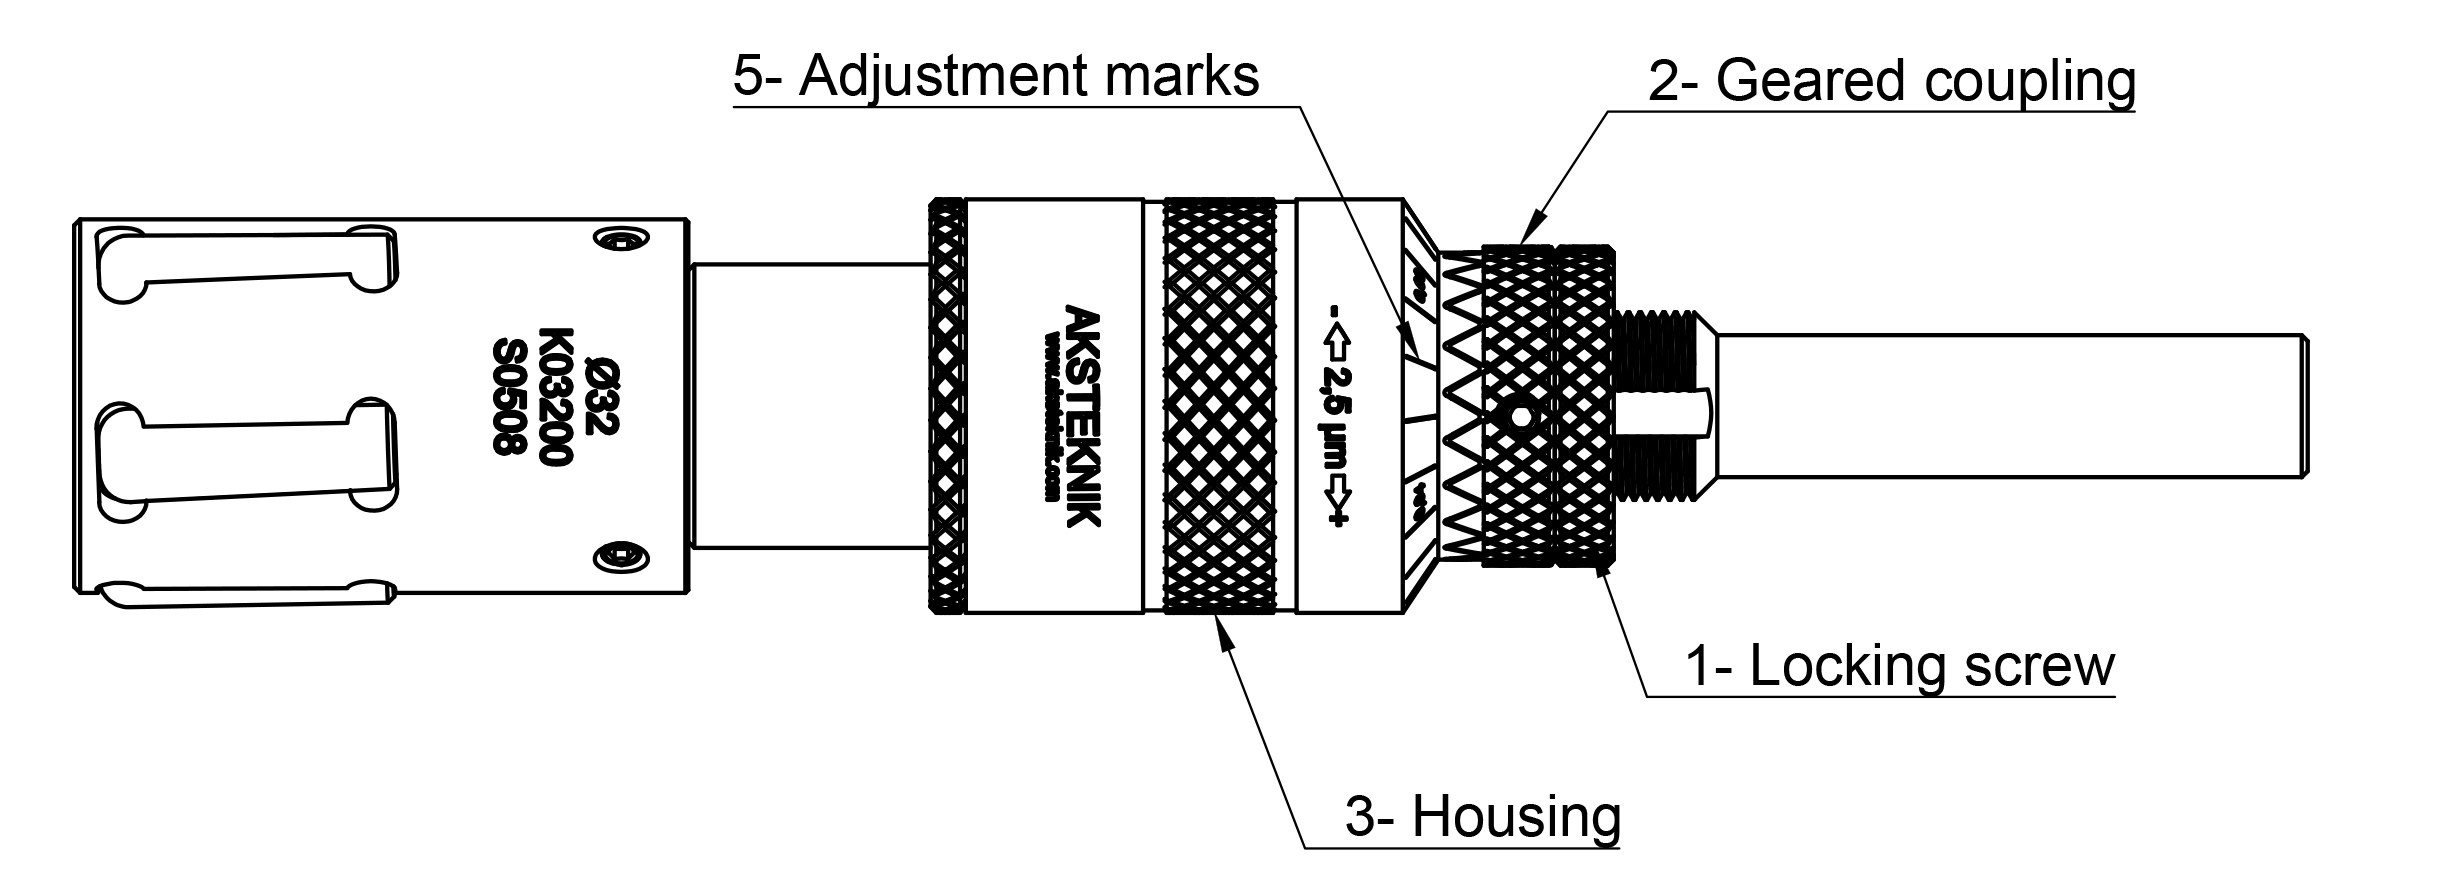 1- Release the locking screw 2- Pull back the greared fixing coupling. 3- Turn the housing right to decrease the diameter so that the tool will fit into the part to be burnished. 4- When the tool slides smoothly into the part to be processed, start rotating the housing left to expand the tool’s diameter until the rollers touch the surface of the part. Once contact is made, withdraw the tool from the part 5- Using the incremental adjustment marks (.0001″/.0025mm) on the housing, adjust the diameter of the tool for the amount of stock left in the bore 6-The final adjustment is made by performing the burnishing process on a workpiece and checking both its dimensions and surface finish. It is advised not to burnish the same part more than twice. Always ensure that the lock nut is tightened after each adjustment
FEEDS & SPEEDS
| Size Range (mm) | Feed Rate (min) (mm/rev) | Feed Rate (max) (mm/rev) | Speed Range (RPM) |
|---|---|---|---|
| 4mm – 9mm | 0.13 mm/rev | 0.31 mm/rev | 1500 to 3000 |
| 9mm – 16mm | 0.31 mm/rev | 0.51 mm/rev | 1000 to 2000 |
| 16mm – 22mm | 0.48 mm/rev | 0.69 mm/rev | 600 to 1200 |
| 22mm – 32mm | 0.56 mm/rev | 1.25 mm/rev | 600 to 1200 |
| 32mm – 44mm | 1.22 mm/rev | 1.80 mm/rev | 300 to 600 |
| 44mm – 57mm | 1.45 mm/rev | 2.67 mm/rev | 200 to 400 |
| 57mm – 70mm | 1.91 mm/rev | 3.15 mm/rev | 170 to 340 |
| 70mm – 95mm | 1.37 mm/rev | 2.95 mm/rev | 170 to 340 |
| 95mm – 108mm | 1.98 mm/rev | 3.07 mm/rev | 100 to 200 |
STOCK ALLOWANCE
| Work Piece Size Range (mm) | Stock left on dia. (mm) | |
High ductility materials (under 40Rc): annealed steel, stainless steel, aluminum, brass and bronze, | 4mm-12mm | 0.01 – 0.02 |
| 12mm-25mm | 0.02 – 0.04 | |
| 25mm-50mm | 0.02 – 0.05 | |
| 50mm-165mm | 0.04 – 0.08 | |
Low ductility materials (greater than 41Rc): grey cast iron, nodular iron, heat treated steel, magnesium alloys and hard copper alloys | 4mm-12mm | 0.010 – 0.02 |
| 12mm-25mm | 0.02 – 0.03 | |
| 25mm-50mm | 0.03 – 0.04 | |
| 50mm-165mm | 0.04 – 0.05 |
Lubrication Guidelines
- During operation, ensure a constant flow of clean lubricant in sufficient quantity to thoroughly clean and flush both the tool and the workpiece.
- For most metals, a standard lightweight, low-viscosity lubricating oil is recommended. Water-soluble coolants can also be used, with an ideal concentration of 8% or more. When working with aluminum or magnesium alloys, a refined paraffin-based oil with low viscosity is optimal.
- In a drill press without coolant capabilities, apply a generous amount of clean lubricant directly onto the tool or the workpiece to ensure proper lubrication.
Alignment
- Proper alignment of the tool and workpiece is crucial for optimal performance. A slight misalignment of 0.10mm will not significantly affect the tool or surface finish. However, greater misalignment can cause bending stresses, leading to fatigue and potential failure of the mandrel tip. Correct alignment becomes even more critical when the tool is rotating.
- The tool shank must be securely mounted in the spindle to prevent any axial movement during the release cycle. This is especially important for larger, heavier tools that operate in a vertical position. In multiple spindle automatics, the tool should be positioned at the top to reduce chip contamination from other metal cutting processes. When the tool operates on a horizontal plane, a generous chamfer lead-in to the workpiece is necessary to ensure proper alignment as the tool enters the bore.
Important Notes
- Burnishing tools should always be operated in a clockwise direction.
- Avoid burnishing the same piece more than twice, as repeated use can cause the material to work-harden. This may result in flaking and improper tool settings.
- When working with harder materials, it might be necessary to lower the RPM below the recommended values to achieve the best results.
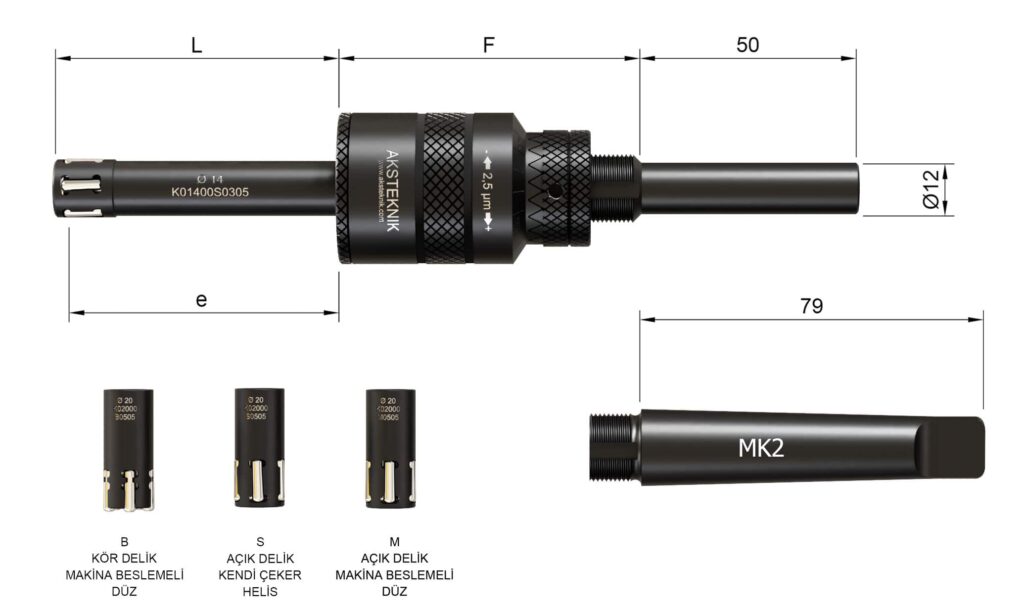
| Dia Ø | Adjustment Range | Dimensions | Rollers | |||||||
|---|---|---|---|---|---|---|---|---|---|---|
| Through Hole | Blind Hole | Working Length | L | F | Through Hole | Blind Hole | ||||
| M | S | B | e | Code | Number of Rollers | Code | Number of Rollers | |||
| 9 | -0.10 +0.30 | -0.10 +0.40 | -0.00 +0.15 | 60 | 66 | 70 | BM02 | 4 | BB02 | 4 |
| 9.5 | -0.10 +0.30 | -0.10 +0.40 | -0.00 +0.15 | 60 | 66 | 70 | BM02 | 4 | BB02 | 4 |
| 10 | -0.10 +0.30 | -0.10 +0.40 | -0.00 +0.15 | 60 | 66 | 70 | BM03 | 4 | BB03 | 4 |
| 10.5 | -0.10 +0.30 | -0.10 +0.40 | -0.00 +0.15 | 60 | 66 | 70 | BM03 | 4 | BB03 | 4 |
| 11 | -0.10 +0.30 | -0.10 +0.40 | -0.00 +0.15 | 60 | 66 | 70 | BM03 | 5 | BB03 | 5 |
| 11.5 | -0.10 +0.30 | -0.10 +0.40 | -0.00 +0.15 | 60 | 66 | 70 | BM03 | 5 | BB03 | 5 |
| 12 | -0.10 +0.30 | -0.10 +0.40 | -0.00 +0.15 | 60 | 66 | 70 | BM03 | 5 | BB03 | 5 |
| 12.5 | -0.10 +0.30 | -0.10 +0.40 | -0.00 +0.15 | 60 | 66 | 70 | BM03 | 5 | BB03 | 5 |
| 13 | -0.10 +0.30 | -0.10 +0.40 | -0.00 +0.15 | 60 | 66 | 70 | BM03 | 5 | BB03 | 3 |
| 13.5 | -0.10 +0.30 | -0.10 +0.40 | -0.00 +0.15 | 60 | 66 | 70 | BM03 | 5 | BB03 | 5 |
| 14 | -0.10 +0.30 | -0.10 +0.40 | -0.00 +0.15 | 60 | 66 | 70 | BM03 | 5 | BB03 | 5 |
| 14.5 | -0.10 +0.30 | -0.10 +0.40 | -0.00 +0.15 | 60 | 66 | 70 | BM03 | 5 | BB03 | 5 |
| 15 | -0.10 +0.30 | -0.10 +0.40 | -0.00 +0.15 | 60 | 66 | 70 | BM03 | 5 | BB03 | 5 |
| 15.5 | -0.10 +0.30 | -0.10 +0.40 | -0.00 +0.15 | 60 | 66 | 70 | BM03 | 5 | BB03 | 5 |
| 16 | -0.10 +0.30 | -0.10 +0.40 | -0.00 +0.15 | 60 | 66 | 70 | BM03 | 5 | BB03 | 5 |
| 16.5 | -0.10 +0.30 | -0.10 +0.40 | -0.00 +0.15 | 60 | 66 | 70 | BM03 | 5 | BB03 | 5 |
| 17 | -0.10 +0.30 | -0.10 +0.40 | -0.00 +0.15 | 60 | 66 | 70 | BM05 | 5 | BB05 | 5 |
| 17.5 | -0.10 +0.30 | -0.10 +0.40 | -0.00 +0.15 | 60 | 66 | 70 | BM05 | 5 | BB05 | 5 |
| 18 | -0.10 +0.30 | -0.10 +0.40 | -0.00 +0.15 | 60 | 66 | 70 | BM05 | 5 | BB05 | 5 |
| 18.5 | -0.10 +0.30 | -0.10 +0.40 | -0.00 +0.15 | 60 | 66 | 70 | BM05 | 5 | BB05 | 5 |
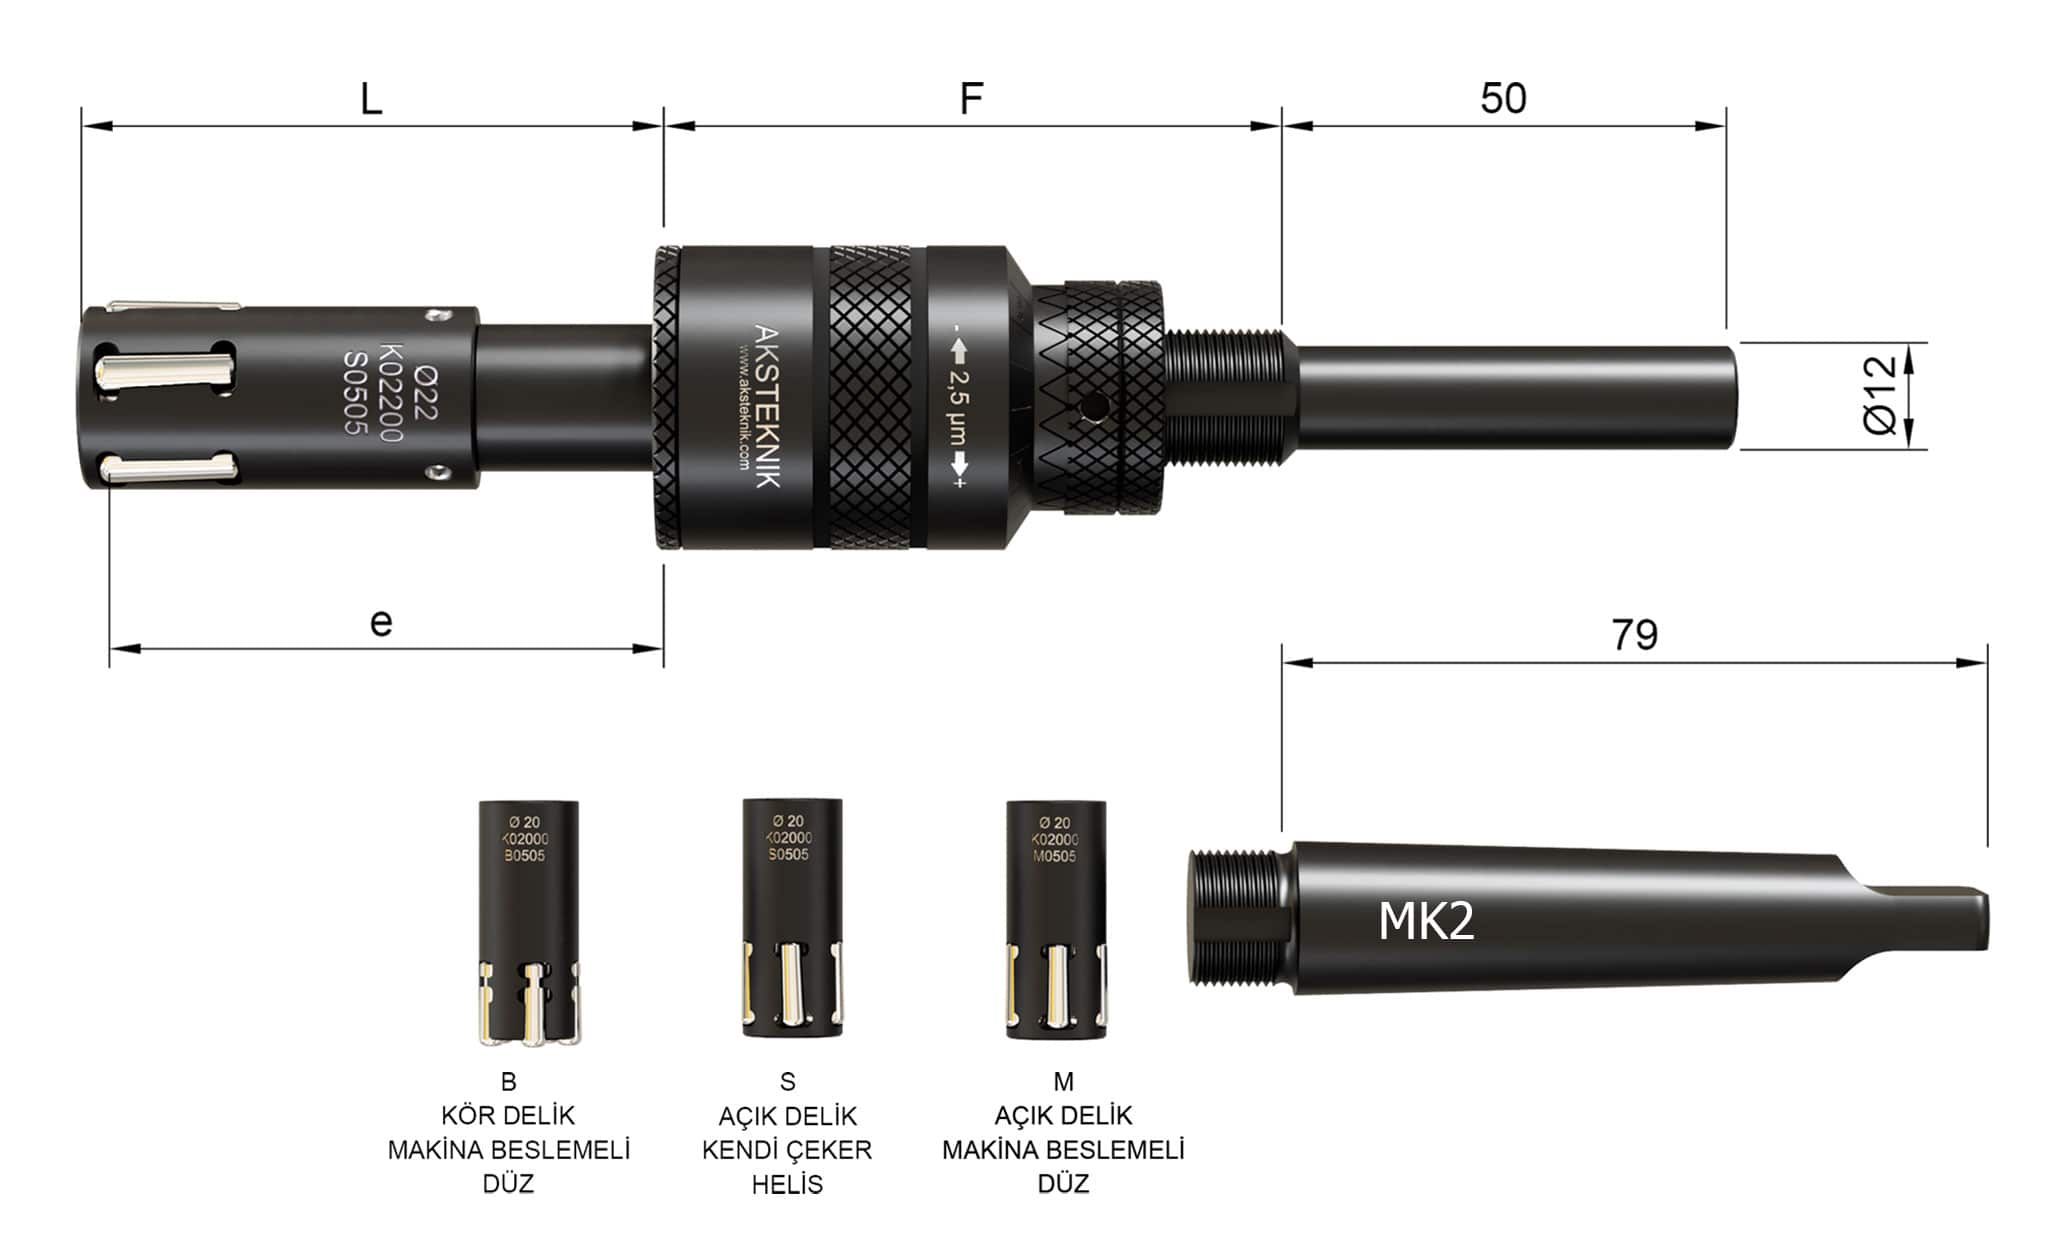
| Dia Ø | Adjustment Range | Dimensions | Rollers | |||||||
|---|---|---|---|---|---|---|---|---|---|---|
| Through Hole | Blind Hole | Working Length | L | F | Through Hole | Blind Hole | ||||
| M | S | B | e | Code | Number of Rollers | Code | Number of Rollers | |||
| 19 | -0.10 +0.40 | -0.10 +0.40 | -0.00 +0.25 | 60 | 66 | 70 | BM05 | 5 | BB05 | 5 |
| 19.5 | -0.10 +0.40 | -0.10 +0.40 | -0.00 +0.25 | 60 | 66 | 70 | BM05 | 5 | BB05 | 5 |
| 20 | -0.10 +0.40 | -0.10 +0.40 | -0.00 +0.25 | 60 | 66 | 70 | BM05 | 5 | BB05 | 5 |
| 20.5 | -0.10 +0.40 | -0.10 +0.40 | -0.00 +0.25 | 60 | 66 | 70 | BM05 | 5 | BB05 | 5 |
| 21 | -0.10 +0.40 | -0.10 +0.40 | -0.00 +0.25 | 60 | 66 | 70 | BM05 | 5 | BB05 | 5 |
| 21.5 | -0.10 +0.40 | -0.10 +0.40 | -0.00 +0.25 | 60 | 66 | 70 | BM05 | 5 | BB05 | 5 |
| 22 | -0.10 +0.40 | -0.10 +0.40 | -0.00 +0.25 | 60 | 66 | 70 | BM05 | 5 | BB05 | 5 |
| 22.5 | -0.10 +0.40 | -0.10 +0.40 | -0.00 +0.25 | 60 | 66 | 70 | BM05 | 5 | BB05 | 5 |
| 23 | -0.10 +0.40 | -0.10 +0.40 | -0.00 +0.25 | 60 | 66 | 70 | BM05 | 5 | BB05 | 3 |
| 23.5 | -0.10 +0.40 | -0.10 +0.40 | -0.00 +0.25 | 60 | 66 | 70 | BM05 | 5 | BB05 | 5 |
| 24 | -0.10 +0.40 | -0.10 +0.40 | -0.00 +0.25 | 60 | 66 | 70 | BM05 | 5 | BB05 | 5 |
| 24.5 | -0.10 +0.40 | -0.10 +0.40 | -0.00 +0.25 | 60 | 66 | 70 | BM05 | 5 | BB05 | 5 |
| 25 | -0.10 +0.40 | -0.10 +0.40 | -0.00 +0.25 | 60 | 66 | 70 | BM05 | 5 | BB05 | 5 |
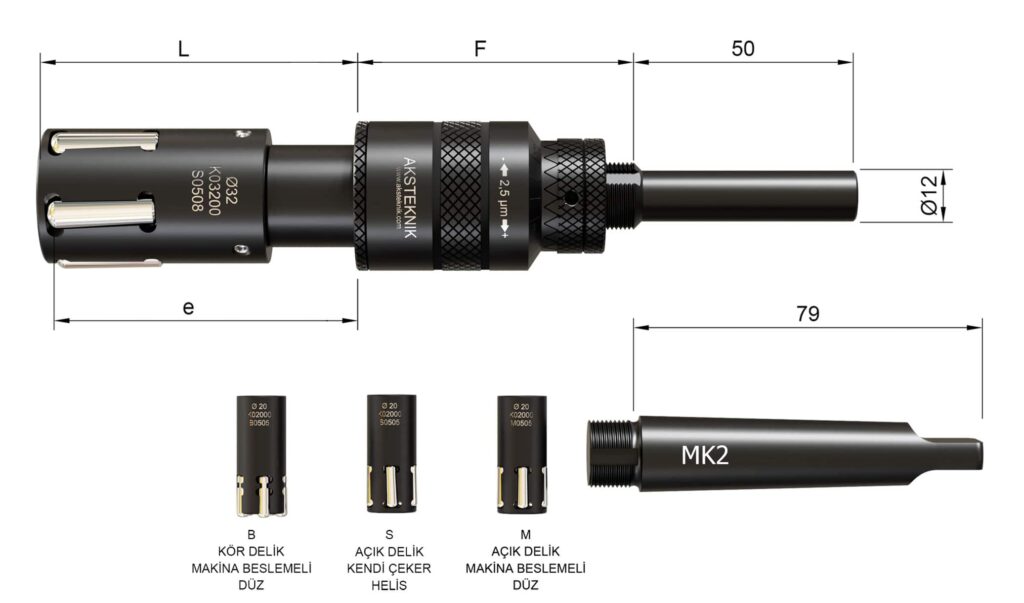
| Dia Ø | Adjustment Range | Dimensions | Rollers | |||||||
|---|---|---|---|---|---|---|---|---|---|---|
| Through Hole | Blind Hole | Working Length | L | F | Through Hole | Blind Hole | ||||
| M | S | B | e | Code | Number of Rollers | Code | Number of Rollers | |||
| 25 | -0.10 +0.40 | -0.10 +0.40 | -0.00 +0.25 | 65 | 72 | 67 | BM05 | 5 | BB05 | 5 |
| 25.5 | -0.10 +0.40 | -0.10 +0.40 | -0.00 +0.25 | 65 | 72 | 67 | BM05 | 5 | BB05 | 5 |
| 26 | -0.10 +0.40 | -0.10 +0.40 | -0.00 +0.25 | 65 | 72 | 67 | BM05 | 5 | BB05 | 5 |
| 26.5 | -0.10 +0.40 | -0.10 +0.40 | -0.00 +0.25 | 65 | 72 | 67 | BM05 | 5 | BB05 | 5 |
| 27 | -0.10 +0.40 | -0.10 +0.40 | -0.00 +0.25 | 65 | 72 | 67 | BM05 | 5 | BB05 | 5 |
| 27.5 | -0.10 +0.40 | -0.10 +0.40 | -0.00 +0.25 | 65 | 72 | 67 | BM05 | 5 | BB05 | 5 |
| 28 | -0.10 +0.40 | -0.10 +0.40 | -0.00 +0.25 | 65 | 72 | 67 | BM05 | 5 | BB05 | 5 |
| 28.5 | -0.10 +0.40 | -0.10 +0.40 | -0.00 +0.25 | 65 | 72 | 67 | BM08 | 5 | BB08 | 5 |
| 29 | -0.10 +0.40 | -0.10 +0.40 | -0.00 +0.25 | 65 | 72 | 67 | BM08 | 5 | BB08 | 5 |
| 29.5 | -0.10 +0.40 | -0.10 +0.40 | -0.00 +0.25 | 65 | 72 | 67 | BM08 | 5 | BB08 | 5 |
| 30 | -0.10 +0.40 | -0.10 +0.40 | -0.00 +0.25 | 65 | 72 | 67 | BM08 | 5 | BB08 | 5 |
| 30.5 | -0.10 +0.40 | -0.10 +0.40 | -0.00 +0.25 | 65 | 72 | 67 | BM08 | 5 | BB08 | 5 |
| 31 | -0.10 +0.40 | -0.10 +0.40 | -0.00 +0.25 | 65 | 72 | 67 | BM08 | 5 | BB08 | 5 |
| 31.5 | -0.10 +0.40 | -0.10 +0.40 | -0.00 +0.25 | 65 | 72 | 67 | BM08 | 5 | BB08 | 5 |
| 32 | -0.10 +0.40 | -0.10 +0.40 | -0.00 +0.25 | 65 | 72 | 67 | BM08 | 5 | BB08 | 5 |
| 32.5 | -0.10 +0.40 | -0.10 +0.40 | -0.00 +0.25 | 65 | 72 | 67 | BM08 | 5 | BB08 | 5 |
| 33 | -0.10 +0.40 | -0.10 +0.40 | -0.00 +0.25 | 65 | 72 | 67 | BM08 | 5 | BB08 | 5 |
| 33.5 | -0.10 +0.40 | -0.10 +0.40 | -0.00 +0.25 | 65 | 72 | 67 | BM08 | 5 | BB08 | 5 |
| 34 | -0.10 +0.40 | -0.10 +0.40 | -0.00 +0.25 | 65 | 72 | 67 | BM08 | 5 | BB08 | 5 |
| 34.5 | -0.10 +0.40 | -0.10 +0.40 | -0.00 +0.25 | 65 | 72 | 67 | BM08 | 5 | BB08 | 5 |
| 35 | -0.10 +0.40 | -0.10 +0.40 | -0.00 +0.25 | 65 | 72 | 67 | BM08 | 5 | BB08 | 5 |
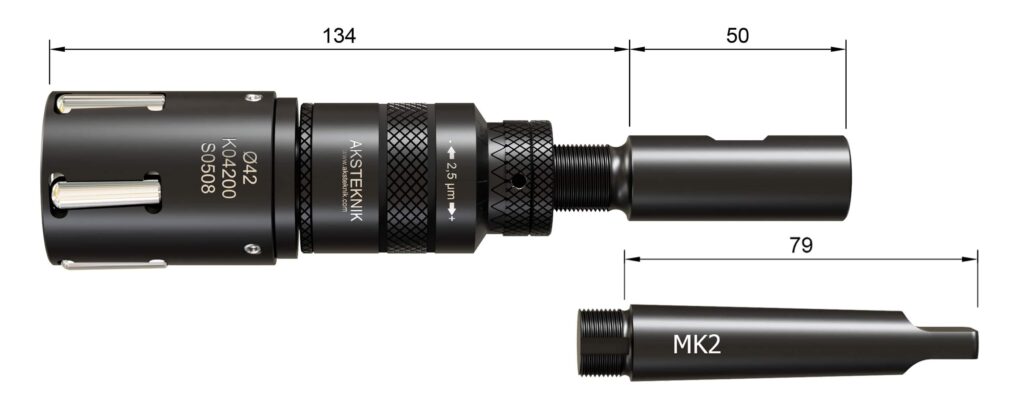
| Dia Ø | Adjustment Range | Working Length | Rollers | |||||||
|---|---|---|---|---|---|---|---|---|---|---|
| Through Hole | Blind Hole | Through Hole | Blind Hole | |||||||
| M | S | B | Code | Number of Rollers | Code | Number of Rollers | ||||
| 35.5 | -0.10 +0.40 | -0.10 +0.40 | -0.00 +0.25 | ∞ UNLIMITED | BM08 | 5 | BB08 | 5 | ||
| 36 | -0.10 +0.40 | -0.10 +0.40 | -0.00 +0.25 | BM08 | 5 | BB08 | 5 | |||
| 36.5 | -0.10 +0.40 | -0.10 +0.40 | -0.00 +0.25 | BM08 | 5 | BB08 | 5 | |||
| 37 | -0.10 +0.40 | -0.10 +0.40 | -0.00 +0.25 | BM08 | 5 | BB08 | 5 | |||
| 37.5 | -0.10 +0.40 | -0.10 +0.40 | -0.00 +0.25 | BM08 | 5 | BB08 | 5 | |||
| 38 | -0.10 +0.40 | -0.10 +0.40 | -0.00 +0.25 | BM08 | 5 | BB08 | 5 | |||
| 38.5 | -0.10 +0.40 | -0.10 +0.40 | -0.00 +0.25 | BM08 | 5 | BB08 | 5 | |||
| 39 | -0.10 +0.40 | -0.10 +0.40 | -0.00 +0.25 | BM08 | 5 | BB08 | 5 | |||
| 39.5 | -0.10 +0.40 | -0.10 +0.40 | -0.00 +0.25 | BM08 | 5 | BB08 | 5 | |||
| 40 | -0.10 +0.40 | -0.10 +0.40 | -0.00 +0.25 | BM08 | 5 | BB08 | 5 | |||
| 40.5 | -0.10 +0.40 | -0.10 +0.40 | -0.00 +0.25 | BM08 | 5 | BB08 | 5 | |||
| 41 | -0.10 +0.40 | -0.10 +0.40 | -0.00 +0.25 | BM08 | 5 | BB08 | 5 | |||
| 41.5 | -0.10 +0.40 | -0.10 +0.40 | -0.00 +0.25 | BM08 | 5 | BB08 | 5 | |||
| 42 | -0.10 +0.40 | -0.10 +0.40 | -0.00 +0.25 | BM08 | 5 | BB08 | 5 | |||
| 42.5 | -0.10 +0.40 | -0.10 +0.40 | -0.00 +0.25 | BM08 | 5 | BB08 | 5 | |||
| 43 | -0.10 +0.40 | -0.10 +0.40 | -0.00 +0.25 | BM08 | 5 | BB08 | 5 | |||
| 43.5 | -0.10 +0.40 | -0.10 +0.40 | -0.00 +0.25 | BM08 | 5 | BB08 | 5 | |||
| 44 | -0.10 +0.40 | -0.10 +0.40 | -0.00 +0.25 | BM08 | 5 | BB08 | 5 | |||
| 44.5 | -0.10 +0.40 | -0.10 +0.40 | -0.00 +0.25 | BM08 | 5 | BB08 | 5 | |||
| 45 | -0.10 +0.40 | -0.10 +0.40 | -0.00 +0.25 | BM08 | 5 | BB08 | 5 | |||
| 45.5 | -0.10 +0.40 | -0.10 +0.40 | -0.00 +0.25 | BM05 | 5 | BB08 | 5 | |||
| 46 | -0.10 +0.40 | -0.10 +0.40 | -0.00 +0.25 | BM08 | 5 | BB08 | 5 | |||
| 46.5 | -0.10 +0.40 | -0.10 +0.40 | -0.00 +0.25 | BM08 | 5 | BB08 | 5 | |||
| 47 | -0.10 +0.40 | -0.10 +0.40 | -0.00 +0.25 | BM08 | 5 | BB08 | 5 | |||
| 47.5 | -0.10 +0.40 | -0.10 +0.40 | -0.00 +0.25 | BM08 | 5 | BB08 | 5 | |||
| 48 | -0.10 +0.40 | -0.10 +0.40 | -0.00 +0.25 | BM08 | 5 | BB08 | 5 | |||
| 48.5 | -0.10 +0.40 | -0.10 +0.40 | -0.00 +0.25 | BM08 | 5 | BB08 | 5 | |||
| 49 | -0.10 +0.40 | -0.10 +0.40 | -0.00 +0.25 | BM08 | 5 | BB08 | 5 | |||
| 49.5 | -0.10 +0.40 | -0.10 +0.40 | -0.00 +0.25 | BM08 | 5 | BB08 | 5 | |||
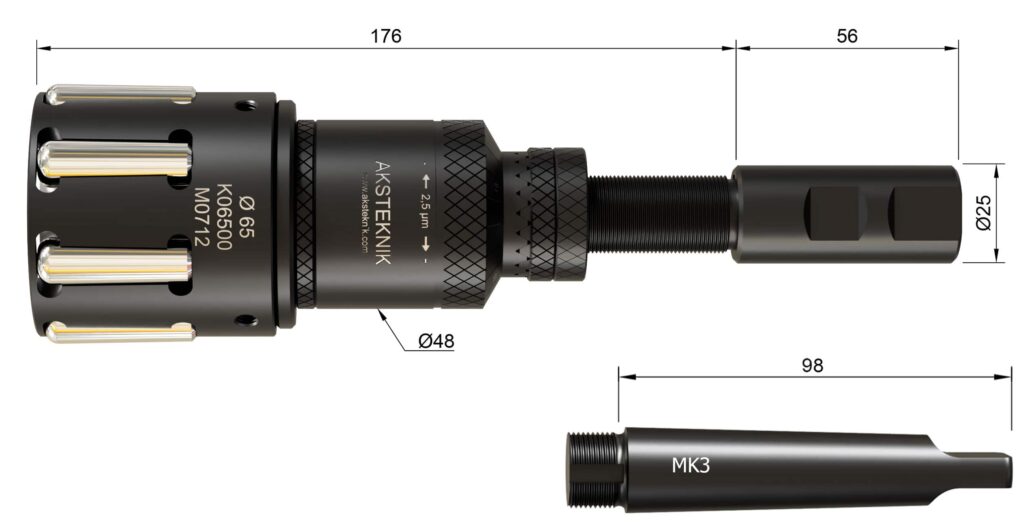
| Dia Ø | Adjustment Range | Working Length | Rollers | |||||||
|---|---|---|---|---|---|---|---|---|---|---|
| Through Hole | Blind Hole | Through Hole | Blind Hole | |||||||
| M | S | B | Code | Number of Rollers | Code | Number of Rollers | ||||
| 50 | -0.10 +0.80 | -0.10 +0.90 | -0.00 +0.25 | ∞ UNLIMITED | BM12 | 5 | BB12 | 5 | ||
| 51 | -0.10 +0.80 | -0.10 +0.90 | -0.00 +0.25 | BM12 | 5 | BB12 | 5 | |||
| 52 | -0.10 +0.80 | -0.10 +0.90 | -0.00 +0.25 | BM12 | 5 | BB12 | 5 | |||
| 53 | -0.10 +0.80 | -0.10 +0.90 | -0.00 +0.25 | BM12 | 7 | BB12 | 7 | |||
| 54 | -0.10 +0.80 | -0.10 +0.90 | -0.00 +0.25 | BM12 | 7 | BB12 | 7 | |||
| 55 | -0.10 +0.80 | -0.10 +0.90 | -0.00 +0.25 | BM12 | 7 | BB12 | 7 | |||
| 56 | -0.10 +0.80 | -0.10 +0.90 | -0.00 +0.25 | BM12 | 7 | BB12 | 7 | |||
| 57 | -0.10 +0.80 | -0.10 +0.90 | -0.00 +0.25 | BM12 | 7 | BB12 | 7 | |||
| 58 | -0.10 +0.80 | -0.10 +0.90 | -0.00 +0.25 | BM12 | 7 | BB12 | 7 | |||
| 59 | -0.10 +0.80 | -0.10 +0.90 | -0.00 +0.25 | BM12 | 7 | BB12 | 7 | |||
| 60 | -0.10 +0.80 | -0.10 +0.90 | -0.00 +0.25 | BM12 | 7 | BB12 | 7 | |||
| 61 | -0.10 +0.80 | -0.10 +0.90 | -0.00 +0.25 | BM12 | 7 | BB12 | 7 | |||
| 62 | -0.10 +0.80 | -0.10 +0.90 | -0.00 +0.25 | BM12 | 7 | BB12 | 7 | |||
| 63 | -0.10 +0.80 | -0.10 +0.90 | -0.00 +0.25 | BM12 | 7 | BB12 | 7 | |||
| 64 | -0.10 +0.80 | -0.10 +0.90 | -0.00 +0.25 | BM12 | 7 | BB12 | 7 | |||
| 65 | -0.10 +0.80 | -0.10 +0.90 | -0.00 +0.25 | BM12 | 7 | BB12 | 7 | |||
| 66 | -0.10 +0.80 | -0.10 +0.90 | -0.00 +0.25 | BM12 | 7 | BB12 | 7 | |||
| 67 | -0.10 +0.80 | -0.10 +0.90 | -0.00 +0.25 | BM12 | 7 | BB12 | 7 | |||
| 68 | -0.10 +0.80 | -0.10 +0.90 | -0.00 +0.25 | BM12 | 7 | BB12 | 7 | |||
| 69 | -0.10 +0.80 | -0.10 +0.90 | -0.00 +0.25 | BM12 | 7 | BB12 | 7 | |||
| 70 | -0.10 +0.80 | -0.10 +0.90 | -0.00 +0.25 | BM12 | 7 | BB12 | 7 | |||
| 71 | -0.10 +0.80 | -0.10 +0.90 | -0.00 +0.25 | BM12 | 9 | BB12 | 9 | |||
| 72 | -0.10 +0.80 | -0.10 +0.90 | -0.00 +0.25 | BM12 | 9 | BB12 | 9 | |||
| 73 | -0.10 +0.80 | -0.10 +0.90 | -0.00 +0.25 | BM12 | 9 | BB12 | 9 | |||
| 74 | -0.10 +0.80 | -0.10 +0.90 | -0.00 +0.25 | BM12 | 9 | BB12 | 9 | |||
| 75 | -0.10 +0.80 | -0.10 +0.90 | -0.00 +0.25 | BM12 | 9 | BB12 | 9 | |||
| 76 | -0.10 +0.80 | -0.10 +0.90 | -0.00 +0.25 | BM12 | 9 | BB12 | 9 | |||
| 77 | -0.10 +0.80 | -0.10 +0.90 | -0.00 +0.25 | BM12 | 9 | BB12 | 9 | |||
| 78 | -0.10 +0.80 | -0.10 +0.90 | -0.00 +0.25 | BM12 | 9 | BB12 | 9 | |||
| 79 | -0.10 +0.80 | -0.10 +0.90 | -0.00 +0.25 | BM12 | 9 | BB12 | 9 | |||
| 80 | -0.10 +0.80 | -0.10 +0.90 | -0.00 +0.25 | BM12 | 9 | BB12 | 9 | |||
| 81 | -0.10 +0.80 | -0.10 +0.90 | -0.00 +0.25 | BM12 | 9 | BB12 | 9 | |||
| 82 | -0.10 +0.80 | -0.10 +0.90 | -0.00 +0.25 | BM12 | 9 | BB12 | 9 | |||
| 83 | -0.10 +0.80 | -0.10 +0.90 | -0.00 +0.25 | BM12 | 9 | BB12 | 9 | |||
| 84 | -0.10 +0.80 | -0.10 +0.90 | -0.00 +0.25 | BM12 | 9 | BB12 | 9 | |||
| 85 | -0.10 +0.80 | -0.10 +0.90 | -0.00 +0.25 | BM12 | 9 | BB12 | 9 | |||
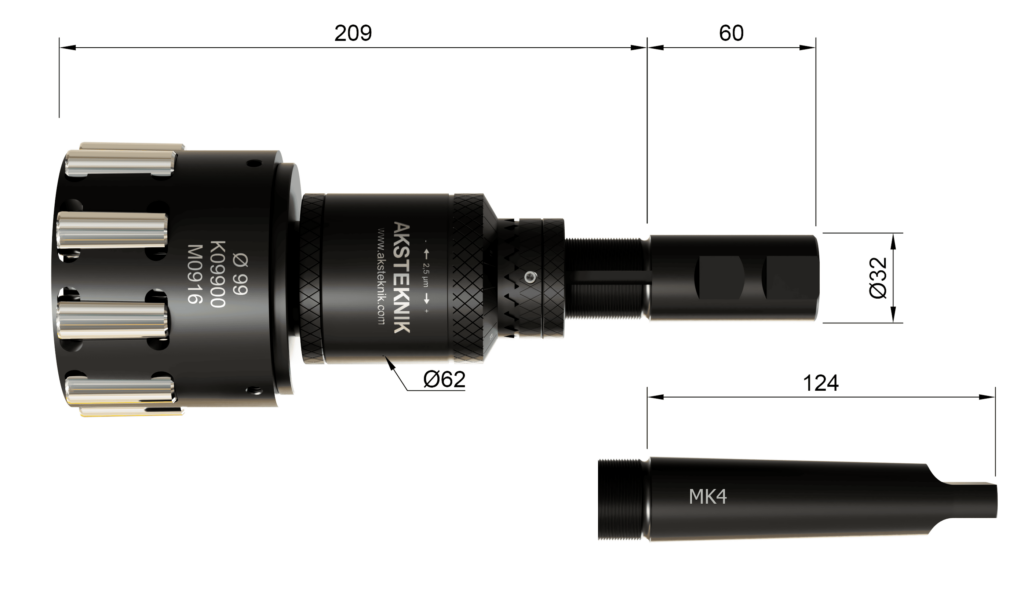
| Dia Ø | Adjustment Range | Working Length | Rollers | |||||||
|---|---|---|---|---|---|---|---|---|---|---|
| Through Hole | Blind Hole | Through Hole | Blind Hole | |||||||
| M | S | B | Code | Number of Rollers | Code | Number of Rollers | ||||
| 86-91 | -0.10 +0.80 | -0.10 +0.90 | -0.00 +0.25 | UNLIMITED∞ | BM16 | 9 | BB16 | 9 | ||
| 92-99 | -0.10 +0.80 | -0.10 +0.90 | -0.00 +0.25 | BM16 | 9 | BB16 | 9 | |||
| 100-109 | -0.10 +0.80 | -0.10 +0.90 | -0.00 +0.25 | BM16 | 11 | BB16 | 11 | |||
| 110-121 | -0.10 +0.80 | -0.10 +0.90 | -0.00 +0.25 | BM20 | 9 | BB20 | 9 | |||
| 122-135 | -0.10 +0.80 | -0.10 +0.90 | -0.00 +0.25 | BM20 | 11 | BB20 | 11 | |||
| 136-150 | -0.10 +0.80 | -0.10 +0.90 | -0.00 +0.25 | BM20 | 11 | BB20 | 11 | |||
| 151-160 | -0.10 +0.80 | -0.10 +0.90 | -0.00 +0.25 | BM20 | 13 | BB20 | 13 | |||


